


The Thursday Tute
at Its So Very Cheri
or
I followed the TUTE
and learned how to …
@Its So Very Cheri
unless you gals come up with another brilliant idea. Help me out, give me your ideas on what you like or don’t like.
and before I turn the floor over to Missy a quick reminder
DON’T forget to enter THIS WEEKS GIVE-A-WAY
Missy’s info is in BLACK, my tidbits are in RED
First-The window Frame. I purchased this window last year from Junk Bonanza, I just knew that I had to have it! I have stared at it for a long time not sure of exactly what I was going to do, I played with it here and there but never really loved anything. SO I kept setting it aside waiting for inspiration to hit me! And one day it finally did! I knew I wanted to use it as a picture frame, and it wasn’t until I began my bedroom remodel that I knew exactly what I would use it for!
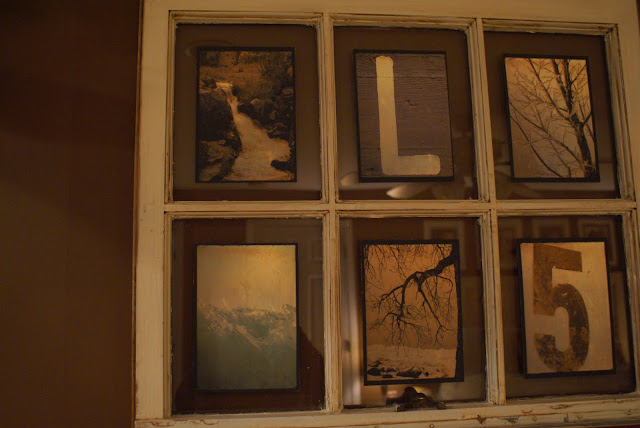
I Printed all my pictures on my computer 4×4, all in a sepia tone with a photo action filter over the top to really give it a distressed look.

The photos are all printed on cream cardstock. I then layered all of them on brown cardstock to give them a more finished look. I used mono adhesive to attached the pictures to the glass. Make sure to clean it thoroughly first though! Who knows what had been on that window!
I used a saying that I cut out with my cricut a while back, this quote used to be on our wall, but I simply peeled it off and added to the center of the window. I copied the saying from a stampin up stamp I had. I know, I misspelled fairytale, but I have no more white cricut vinyl, and haven’t been to the store to buy more, and it makes me laugh whenever I see it, It was 2:00am when I originally did this, and I knew something didn’t look quite right, I realized the next morning what I did wrong!  The great thing about this is the pictures are easy to change, and I can add new ones anytime I want to.
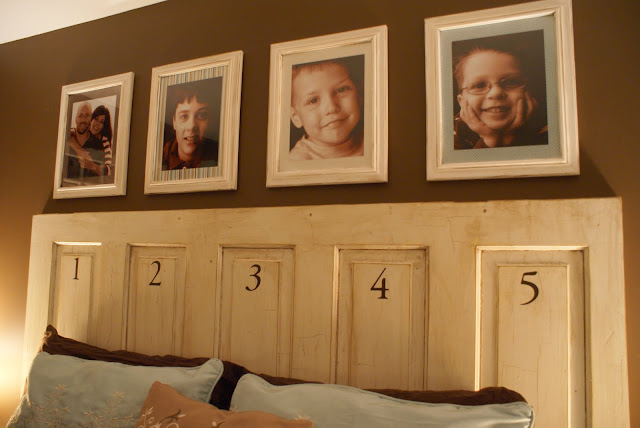
The Headboard: I have always hated our headboard, I have had it for about 15 years, it was cheap, and very simple. It really never went with my decor. So as I was accidentally re-doing my room, I was thinking of what I had in my garage that I could turn into a headboard, and then I remembers the old wooden door! It was perfect! I immediatly ran out to the garage to get it it, I wiped it down, and sanded it. then gave it a fresh coat of paint and sanded agian, then added my new favorite Ralph Lauren smoke glaze, which gave it exactly the look I was going for! I had my hubby help me with the hanging, it was very heavy and I knew it had to be in studs. He was able to hang it in no time,

Then I cut the numbers 1-5 out with my cricut & crucit vinyl in brown.  That is it! Now I have this amazing headboard, that I was able to get for free, from the side of the road!


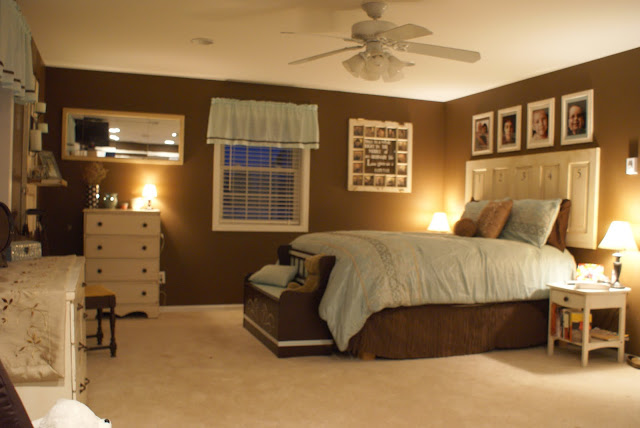
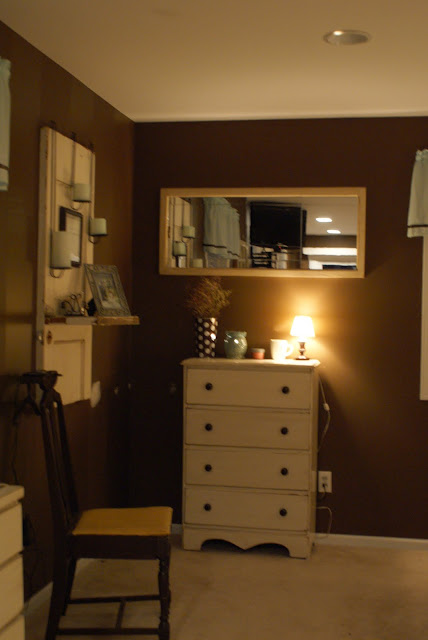 but that’s my own fault for not clarifying between the two doors.
Missy was kind enough to do this tutorial and she just had surgery so I couldn’t ask any more from her and besides, her headboard is adorable too.
Missy e-mailed these instructions for us on the above door:
That door was painted & glazed the same way, I just cut off 10 inches off the bottom of the door, and used the hinges as brackets to attach it to the door. Thats it! You can make the shelf as wide or narrow as you like!
Thanks so much for coming by to It’s so Very Cheri, and if you would like to read more about my Accidental Bedroom remodel you can go here.

Cheri


{ 0 comments… add one now }