I Followed the TUTE and learned how to make a snazzy lampshade
by CHERI on April 15, 2010
She is from Michigan, I grew up in Michigan for part of my young life.  Her name is Sherry, my name is Cheri. She covers lampshades, I cover lampshades. She’s on a TV show today–I’m NOT–Who can get me booked on HGTV??? Check out her site today for more great info.
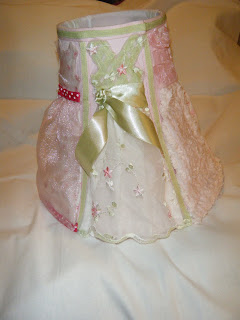
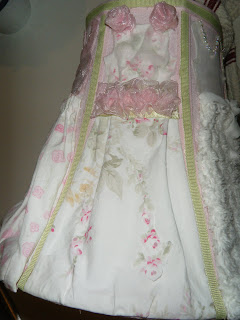
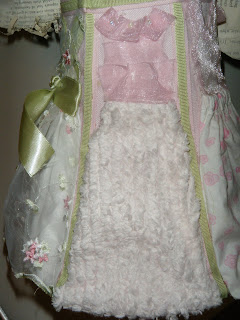
I will have to show give you gals the Shabby Chic DRESS UP lampshade I did for Miss GOO after our guest Tutorial.
Ladies–here’s Sherry
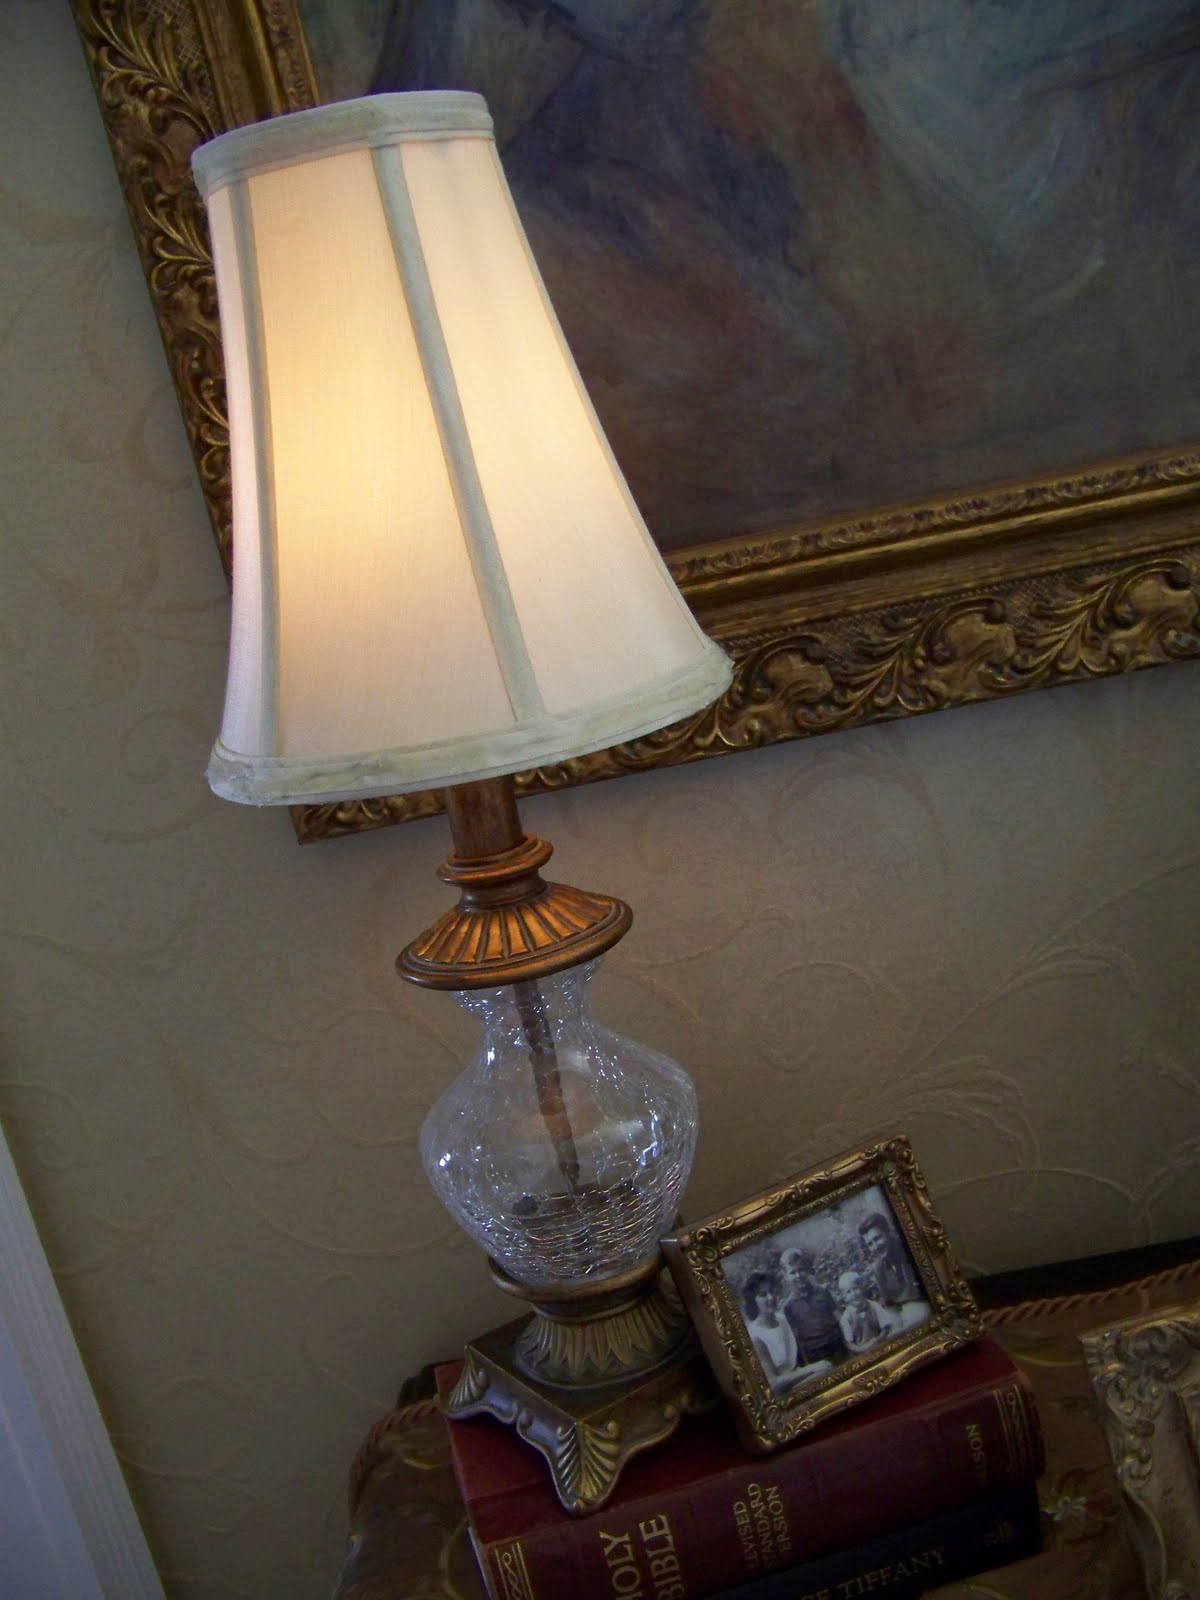
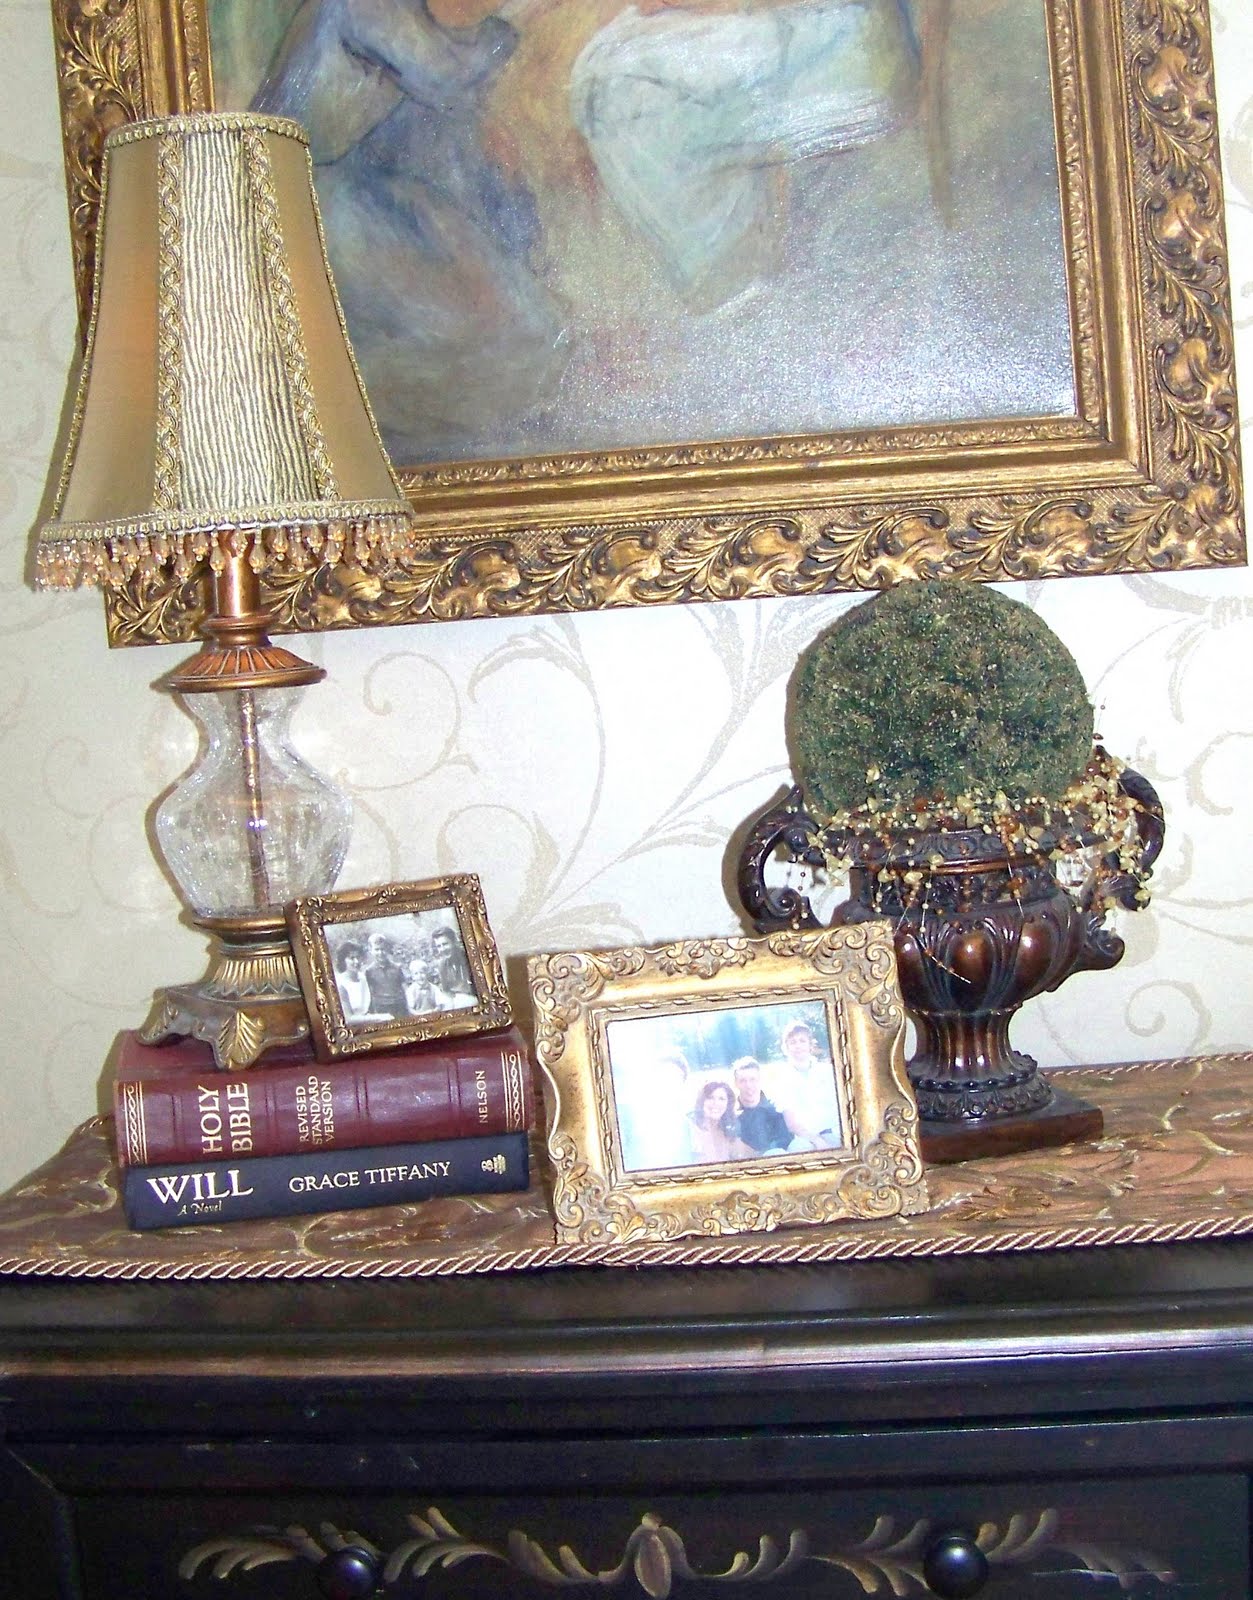
Hi, I’m Sherry from “Creations From My Heart†and I am so excited to share with you My Thursday Toot. When Cheri asked me to post a tutorial I wanted to share with you something that you can transform in your home. So today I’m going to share with you an easy way to turn an Ordinary lampshade into something extra-ordinary. Let me first share with you my ordinary lampshade.
I like the style of the lampshade. It has good “bones†but it’s just to plain for my taste.
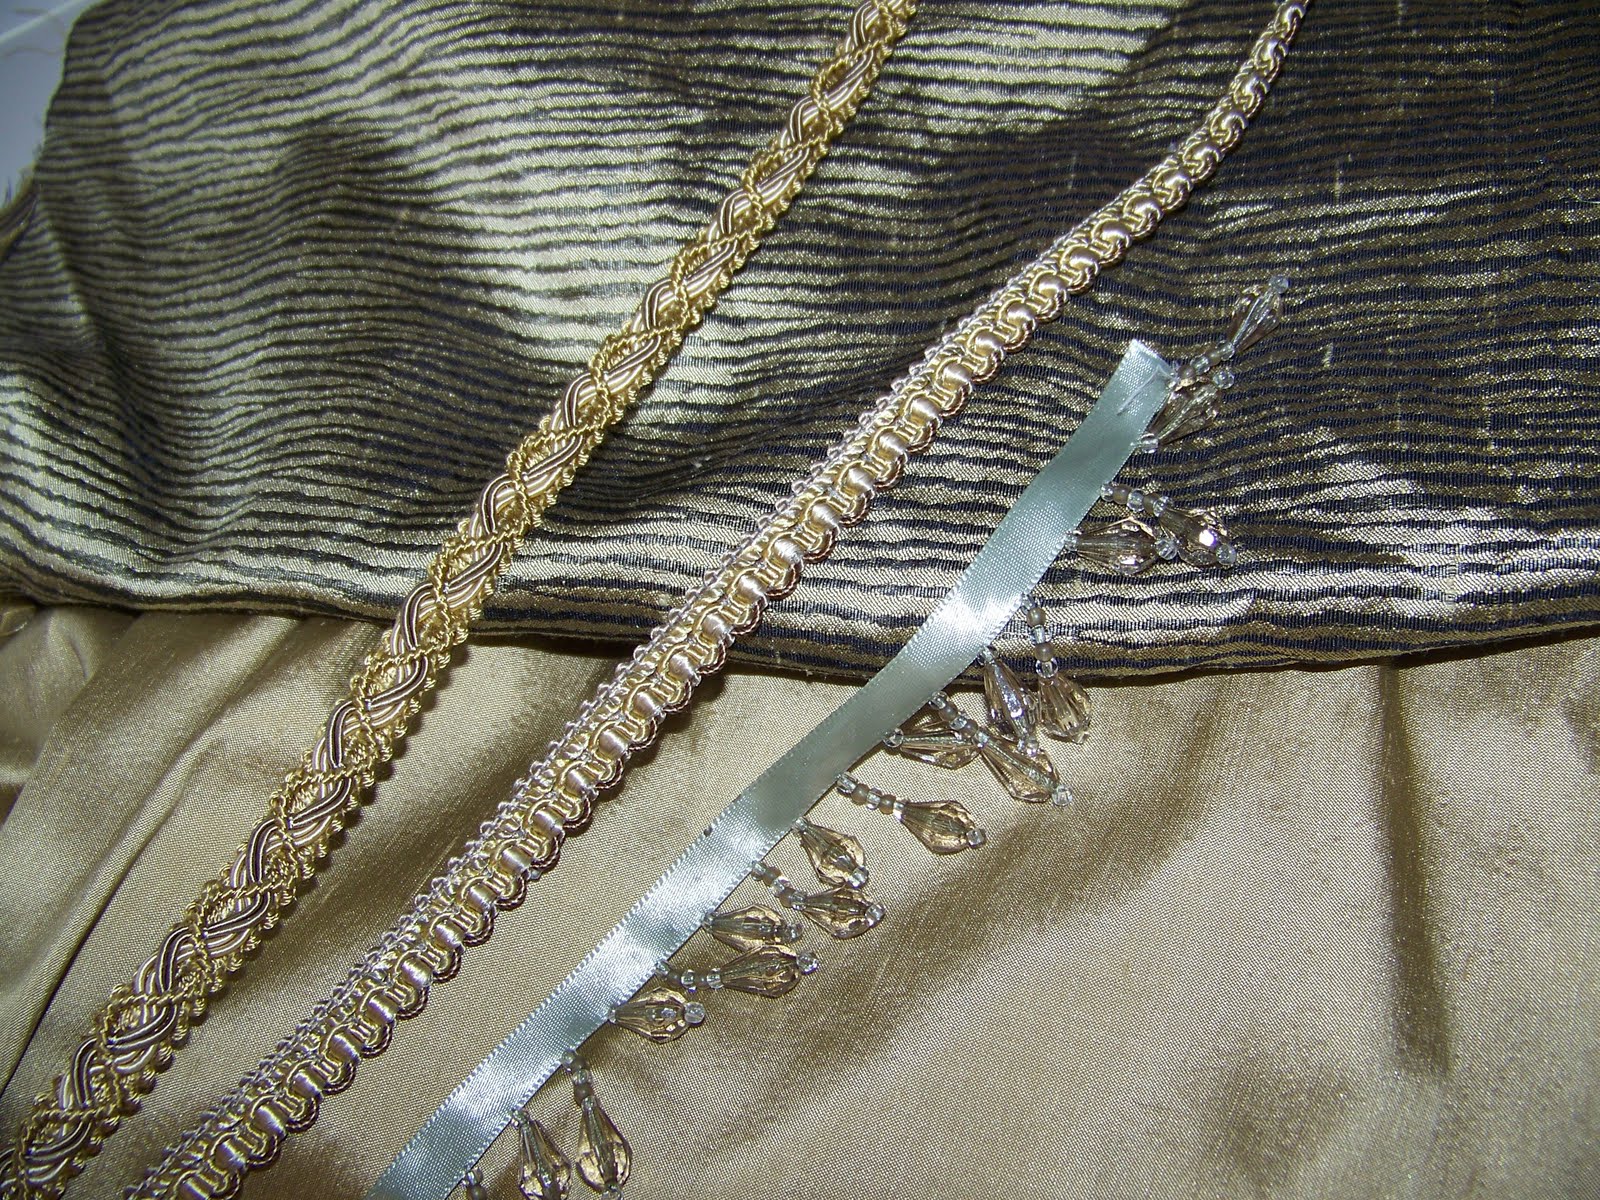
Now it’s time to started transforming this lampshade. First step is to gather your materials. I always use a few different fabrics and trims. I decided to cover this lampshade in a solid gold silk with a coordinating print fabric. The fabric was a gold silk fabric that had a black stripe.It almost looks like a thin zebra print. Next, I selected a beaded trim, and two different braid trims.
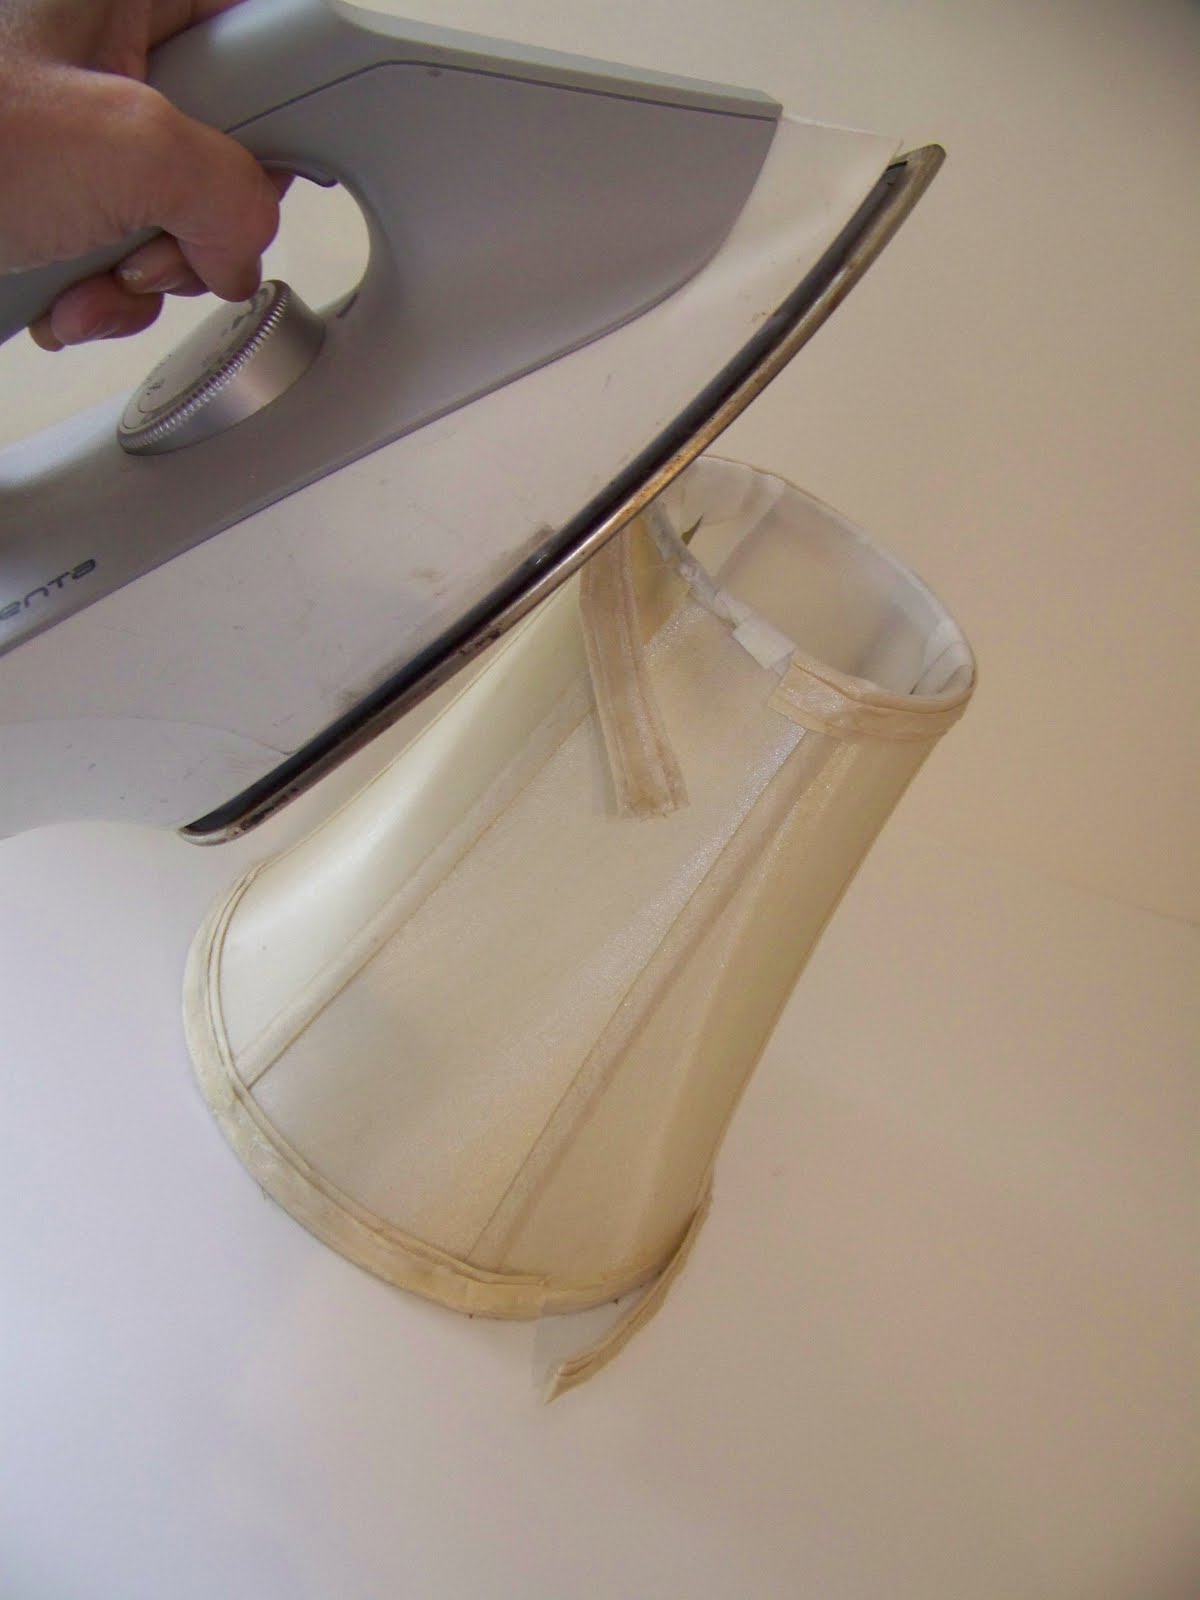
Let’s get to work… The first step is to remove the bias trim from the lampshade. Here’s a trick. Use the steam from your iron to heat up the glue that holds the bias tape to the lampshade. This makes the bias tape very easy to pull off and you won’t rip the shade.
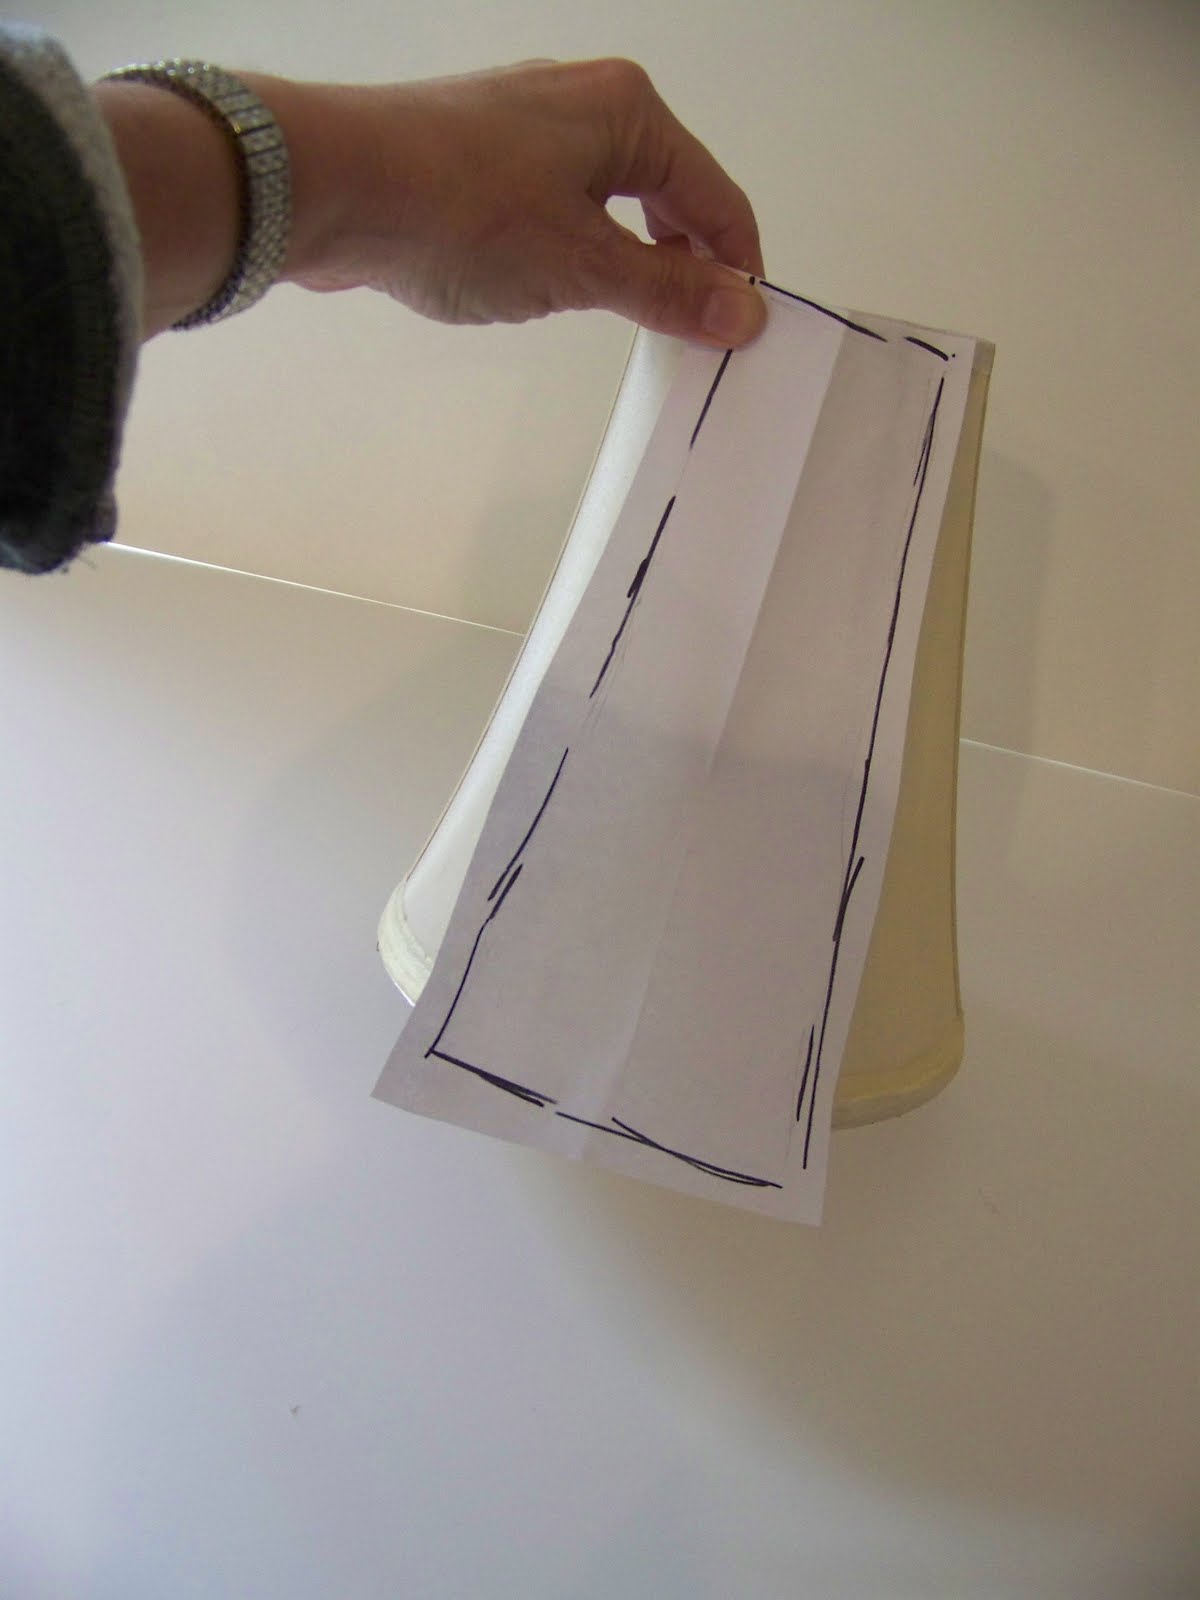
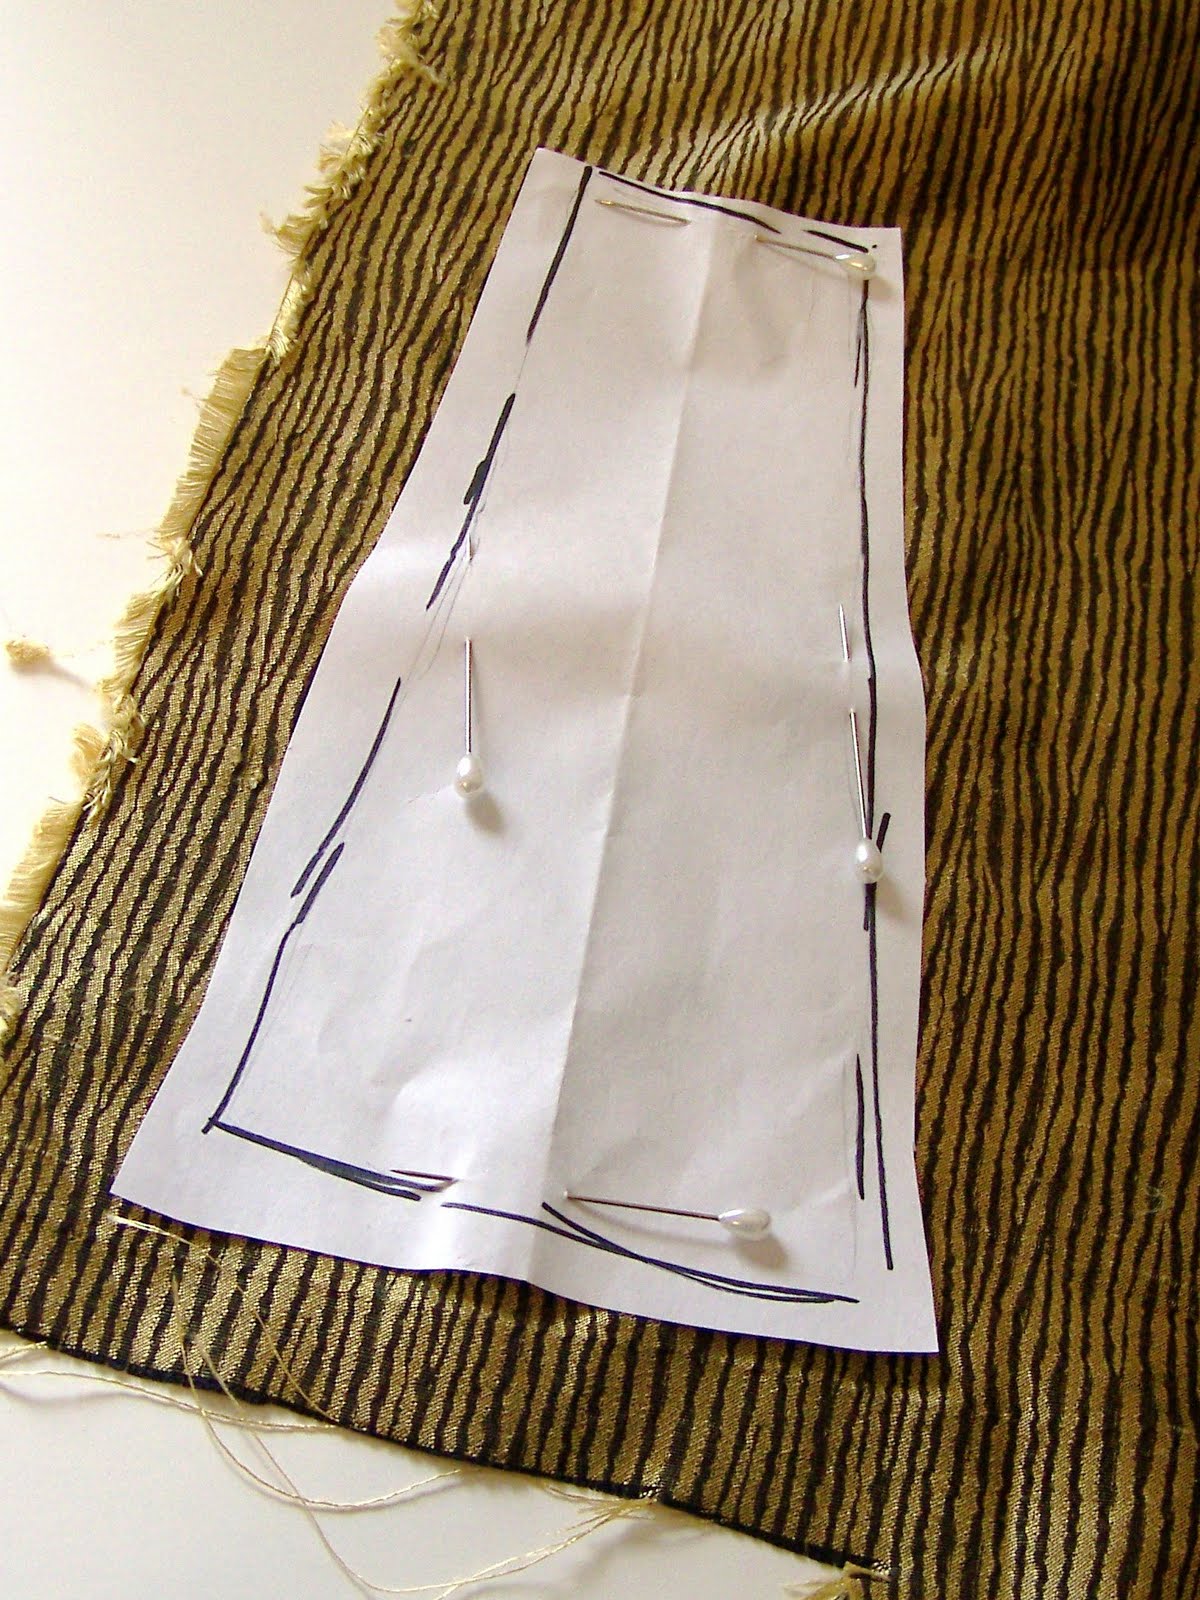
Once all the bias tape is removed, we need to make a pattern. Simply take a piece of paper and trace one of the sections with a marker. (Make sure the marker does not bleed onto the lampshade)
Pin your pattern onto your fabric and cut out the pattern.
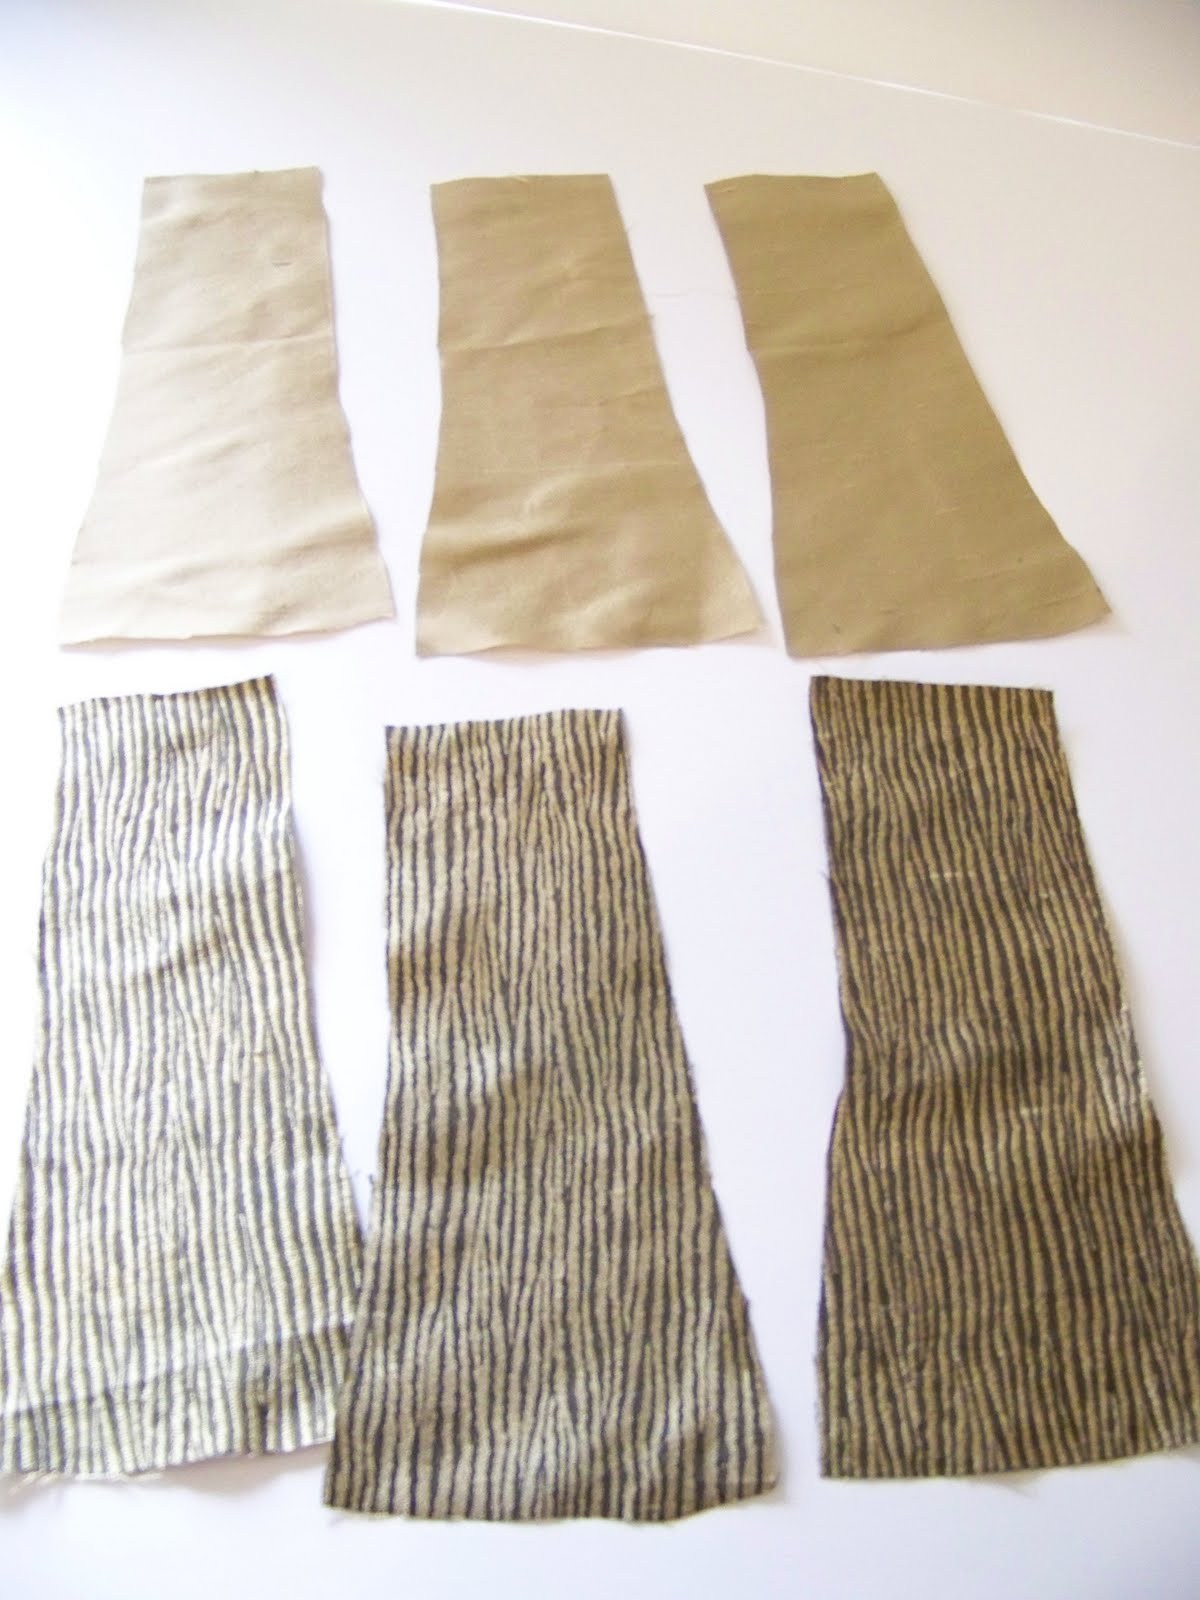
This lampshade had six sections, so I needed to cut 3 pieces of each of my two different fabrics.
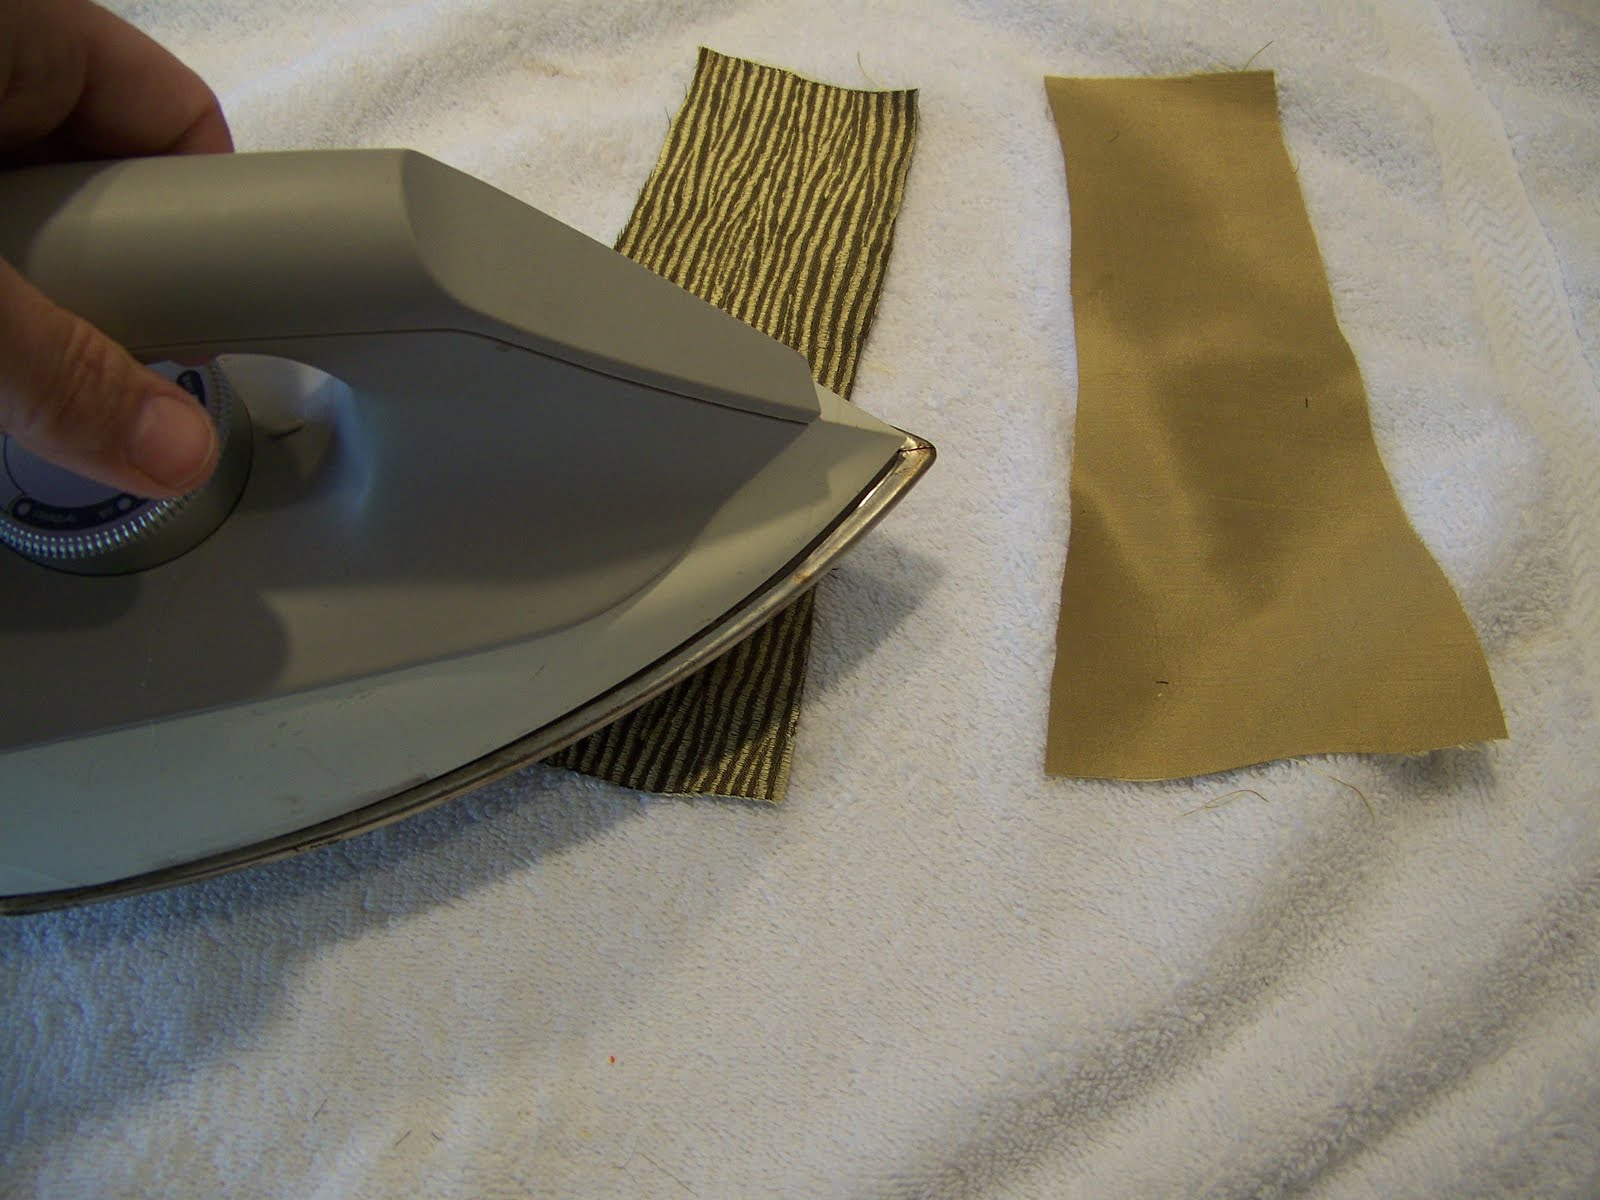
Now is the time to iron the fabric. Make sure you get all the wrinkles out. Once it’s on your lampshade you want it to look perfect!
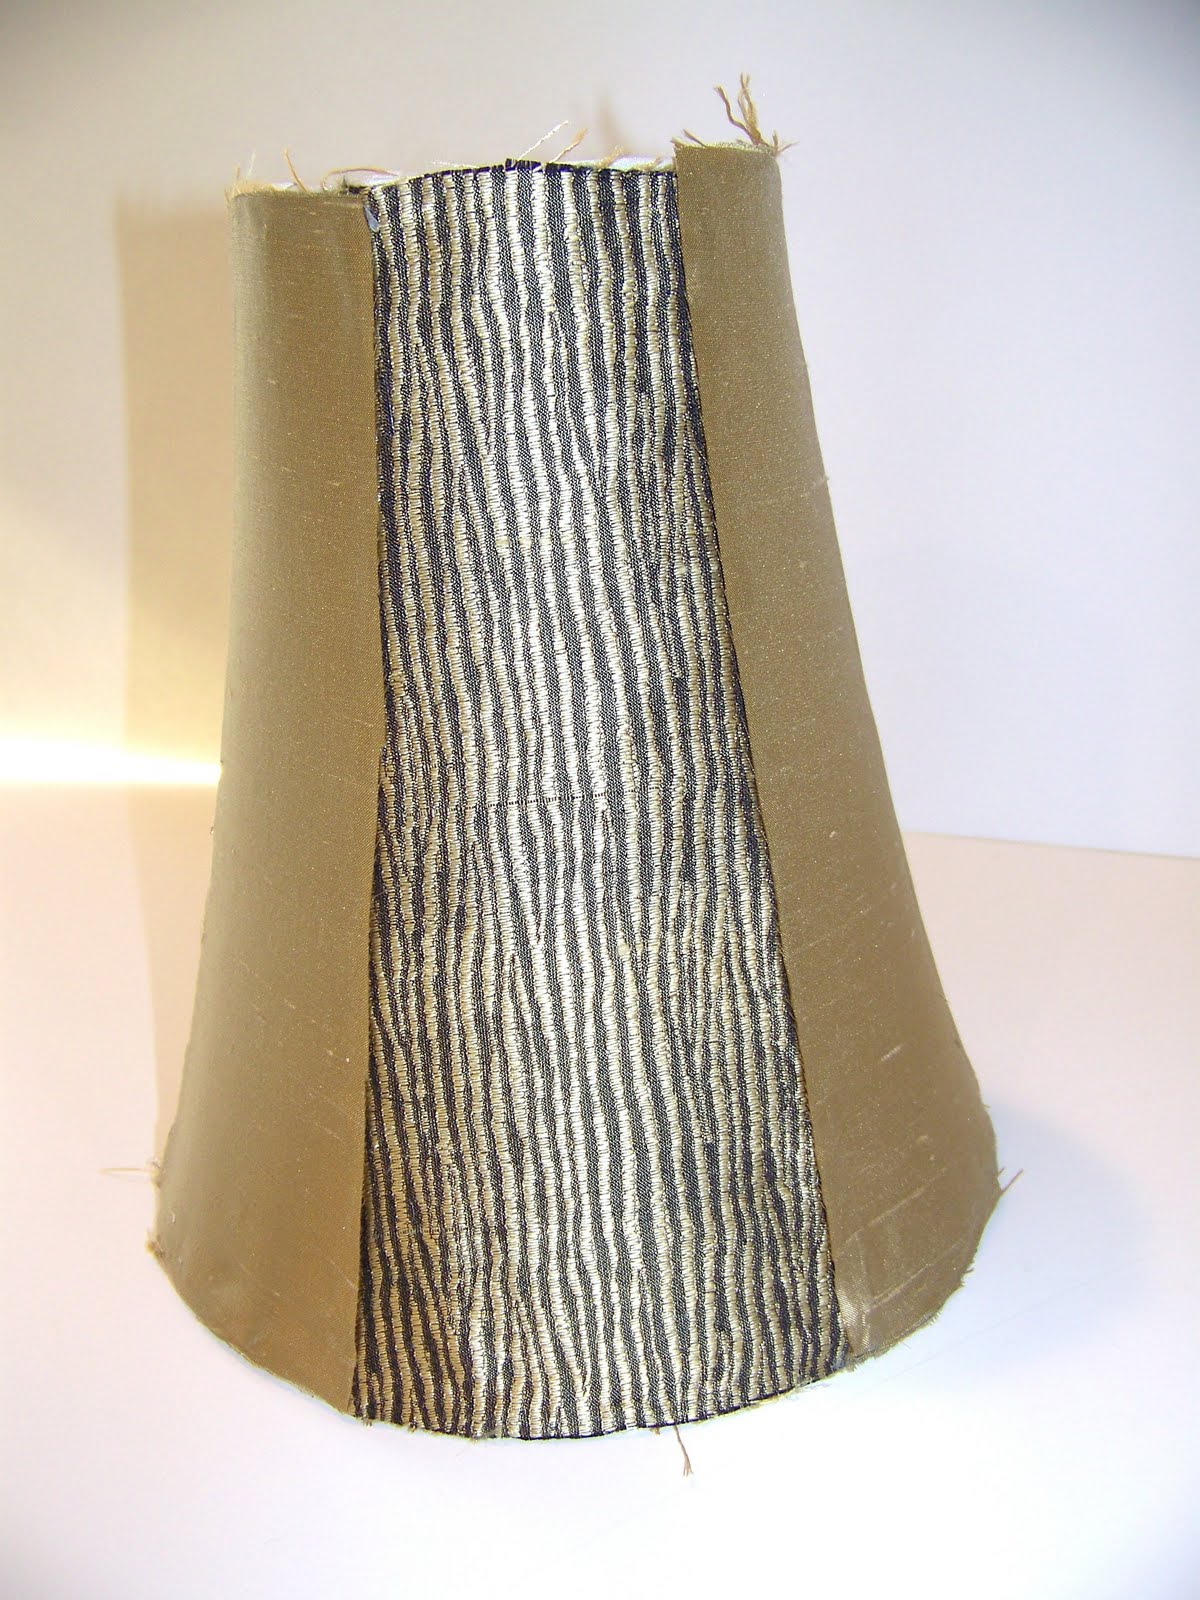
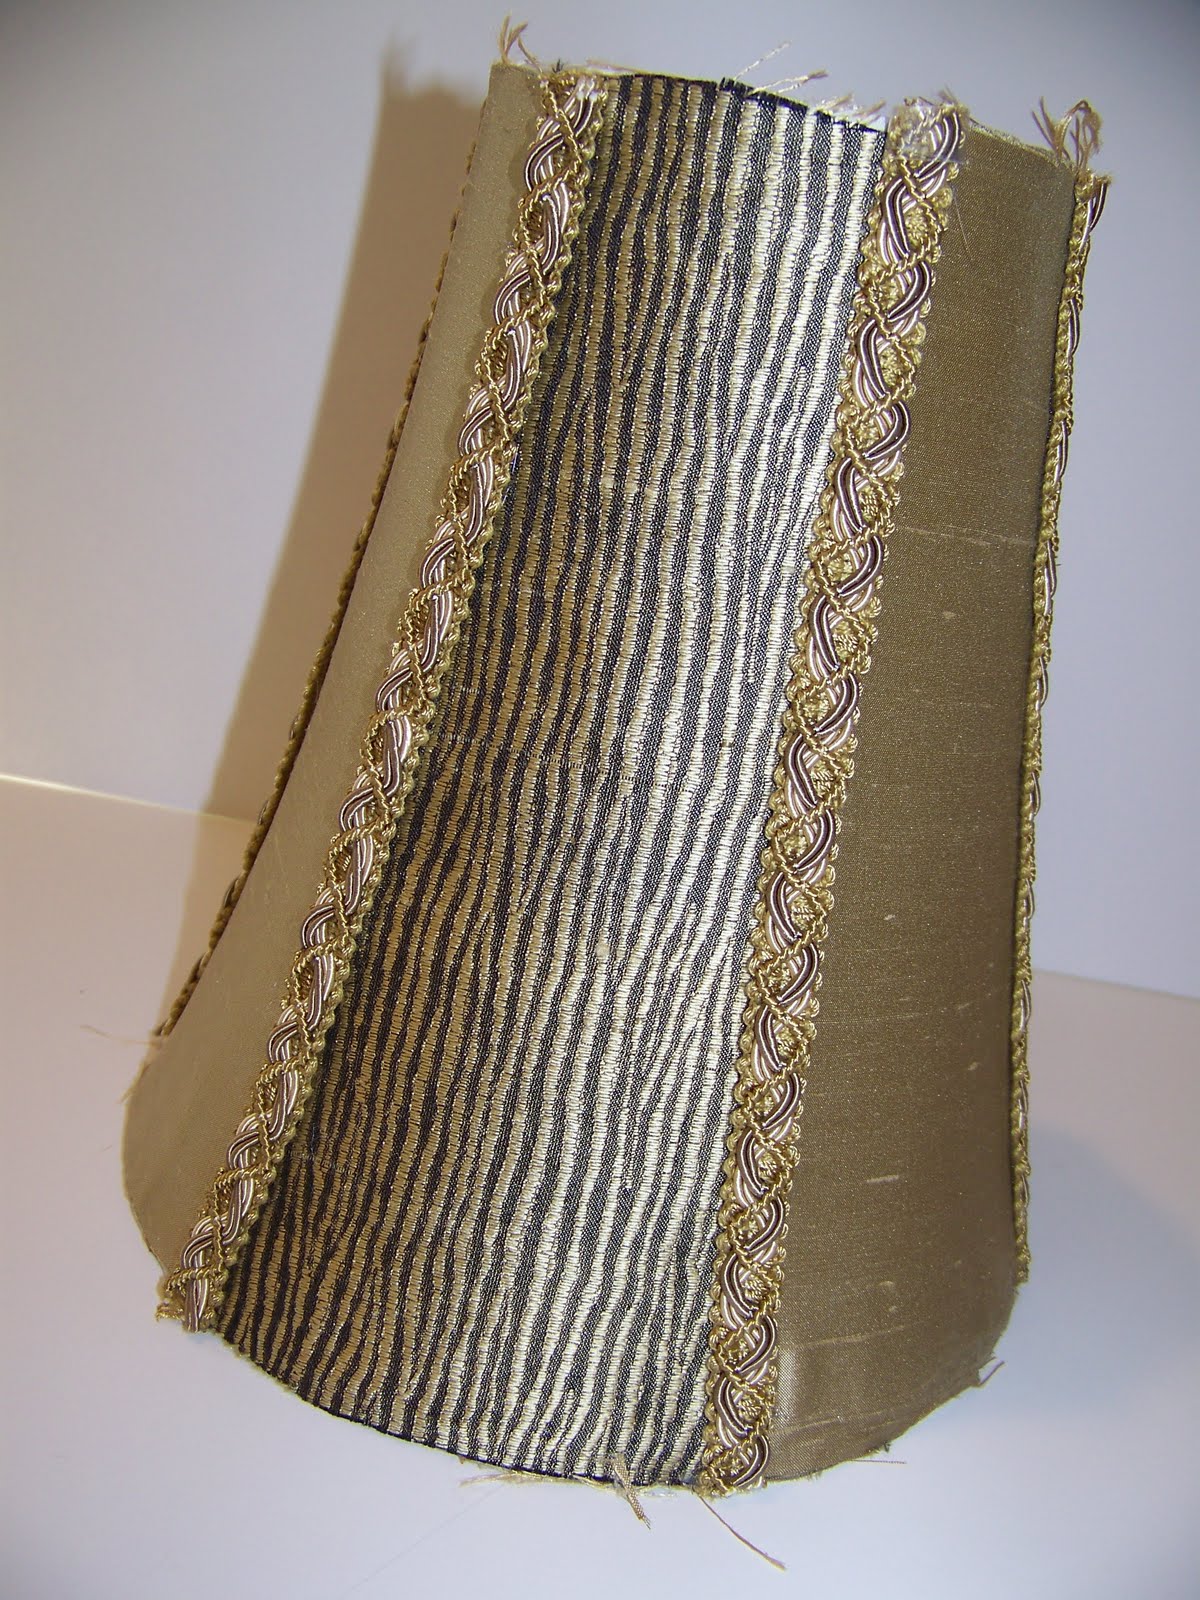
Let’s heat up your glue gun and start to glue the sections onto the lampshade. Run a bead of glue along the top edge of the first section, and then continue down one side. Place the glue directly on top of the bias tape. When you have finished gluing down one side, continue on the other side of the section. Finish by gluing the bottom of the fabric to the lampshade.
Now you can begin to use the other coordinating fabric. Glue the fabric to the section that is next to the section you just completed. Continue gluing each section alternating fabric patterns, until you have done the entire lampshade. This may look a bit messy but just wait, the trim makes all the difference.
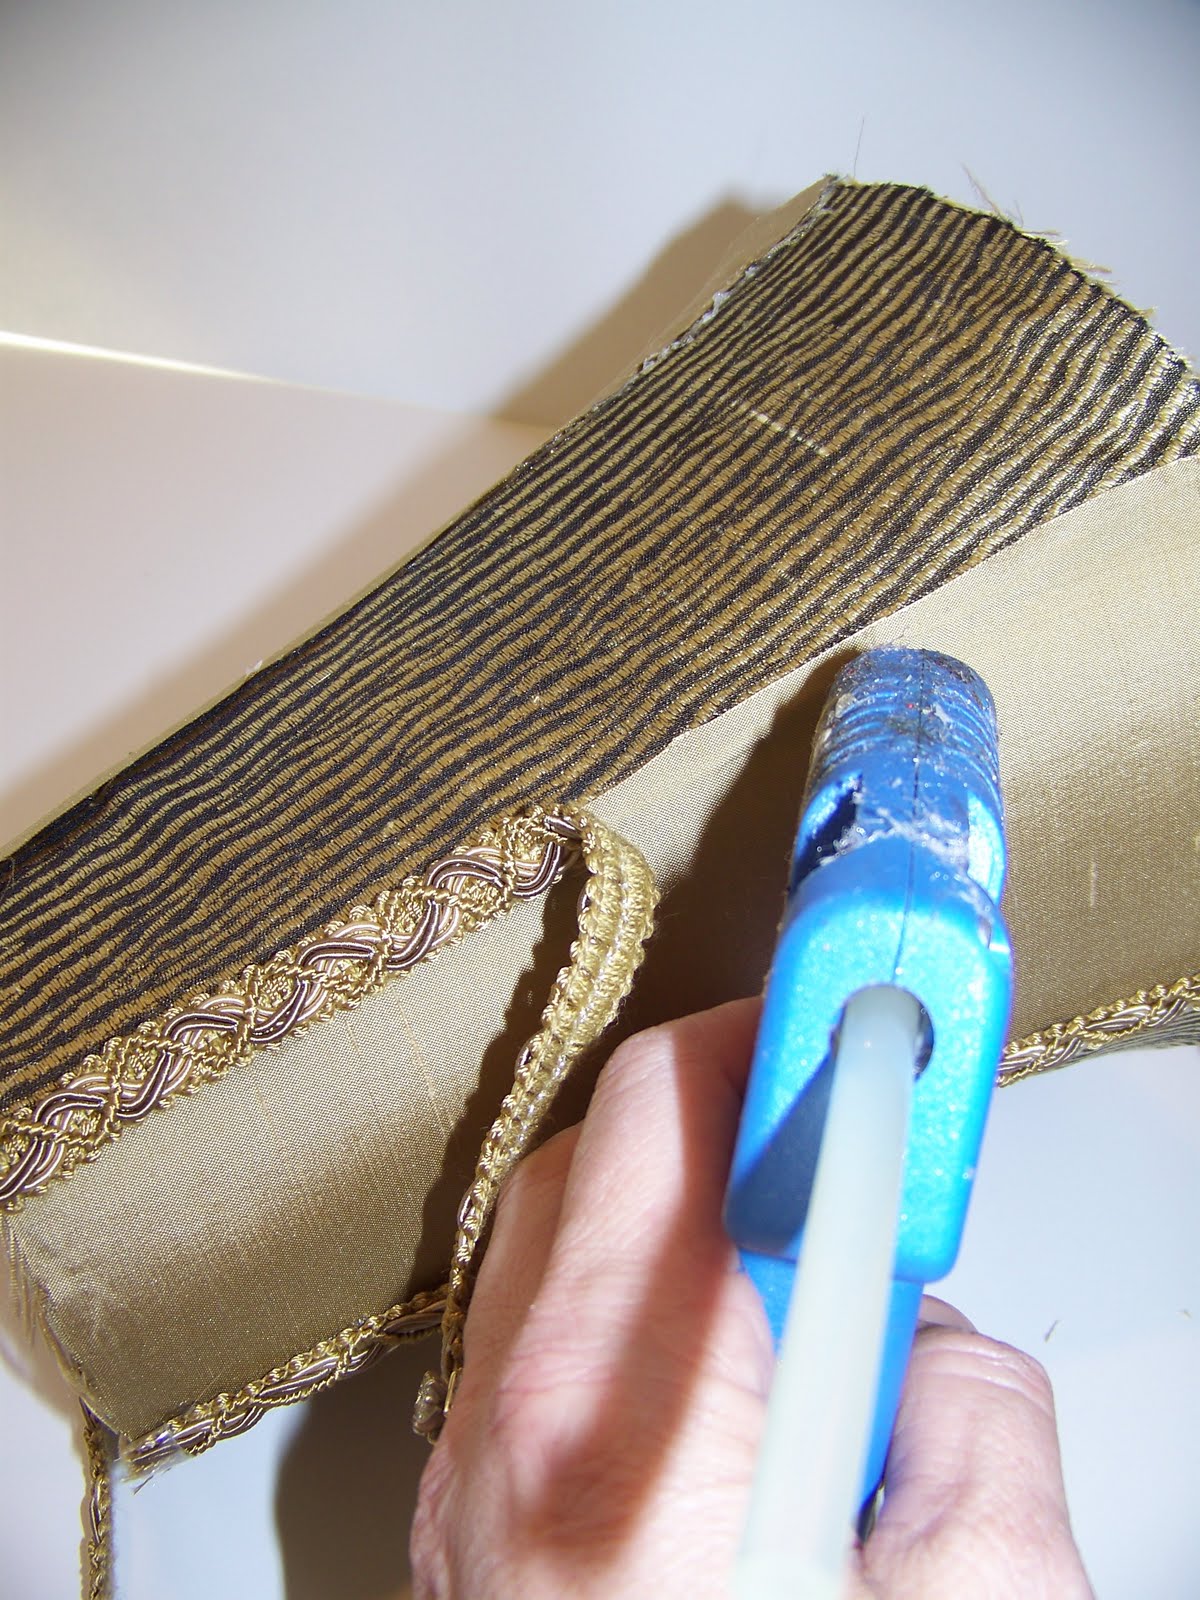
Let’s start putting the trim on. You won’t believe how much this changes the look. Run a bead of glue where the two different fabrics meet each other.
Continue working all the way around the lampshade. Can you see how the trim hides any little problems.
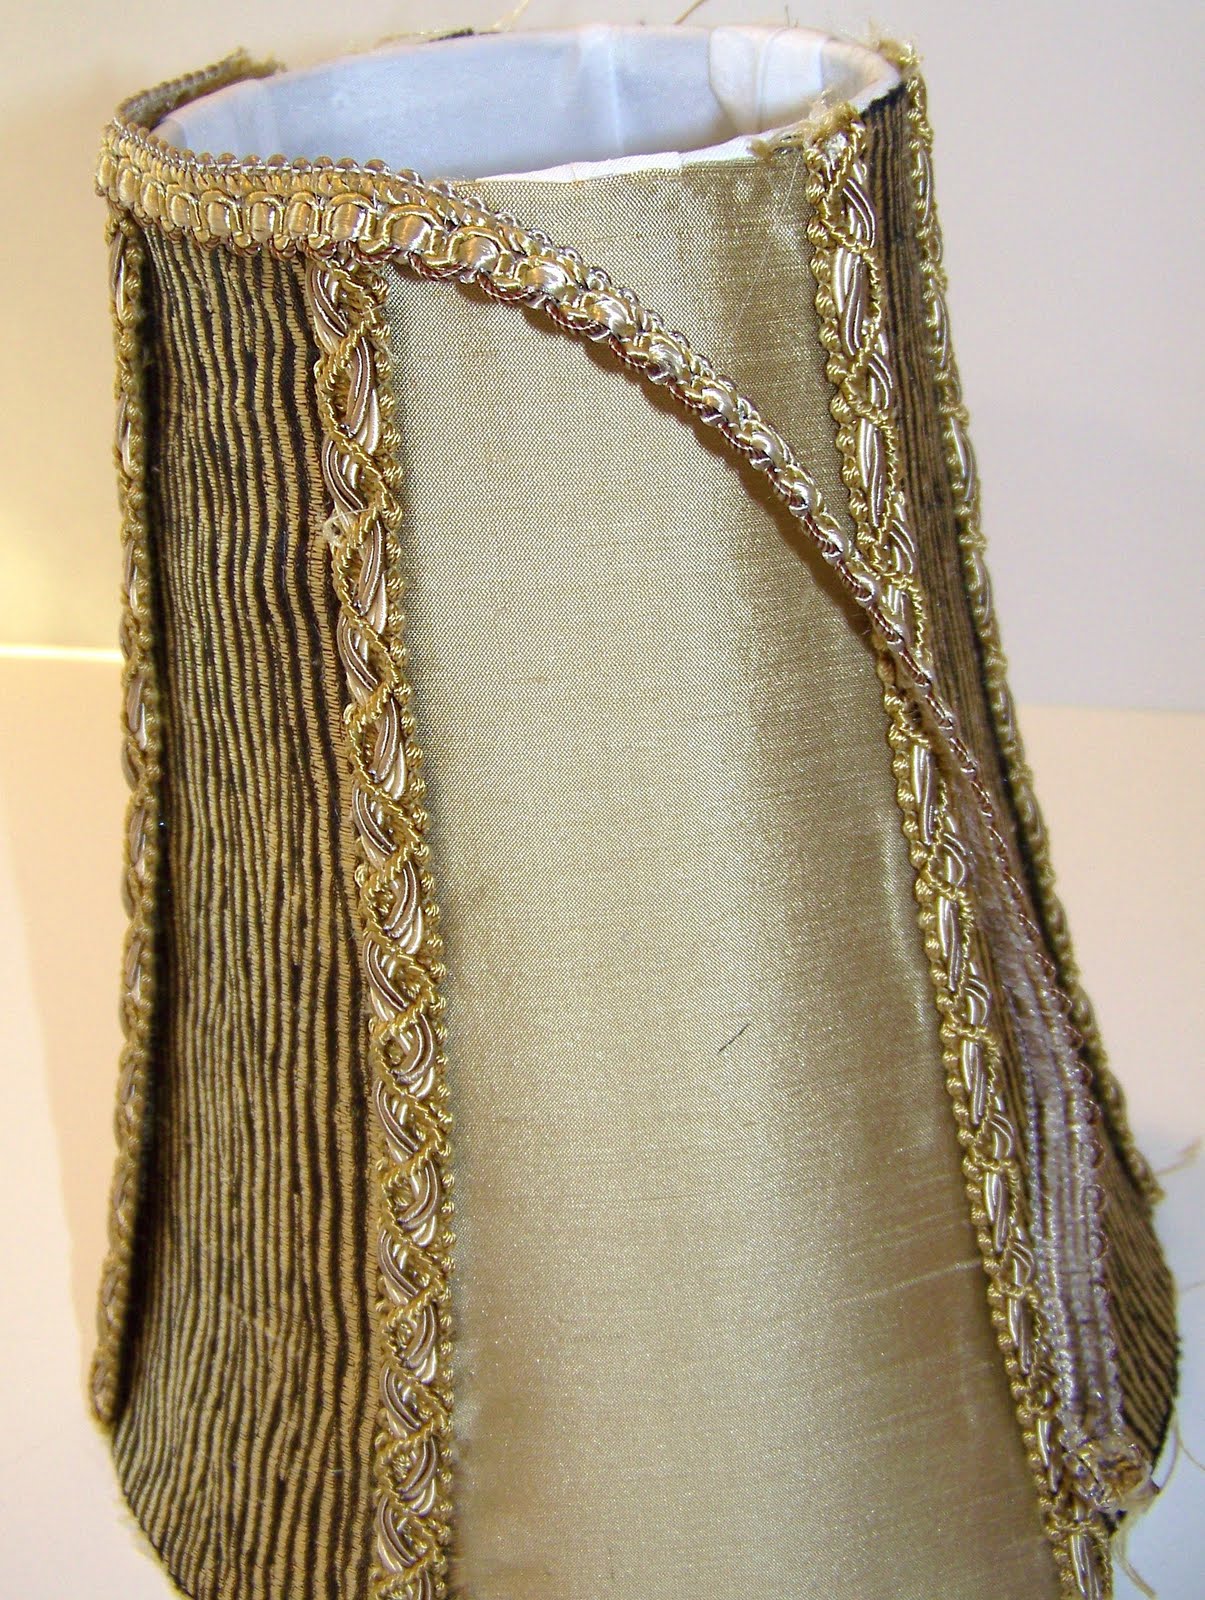
Next step is to use the other braided trim and glue it to the top edge of the lampshade. When you get all the way around turn under the raw edge and overlap the trim and glue.
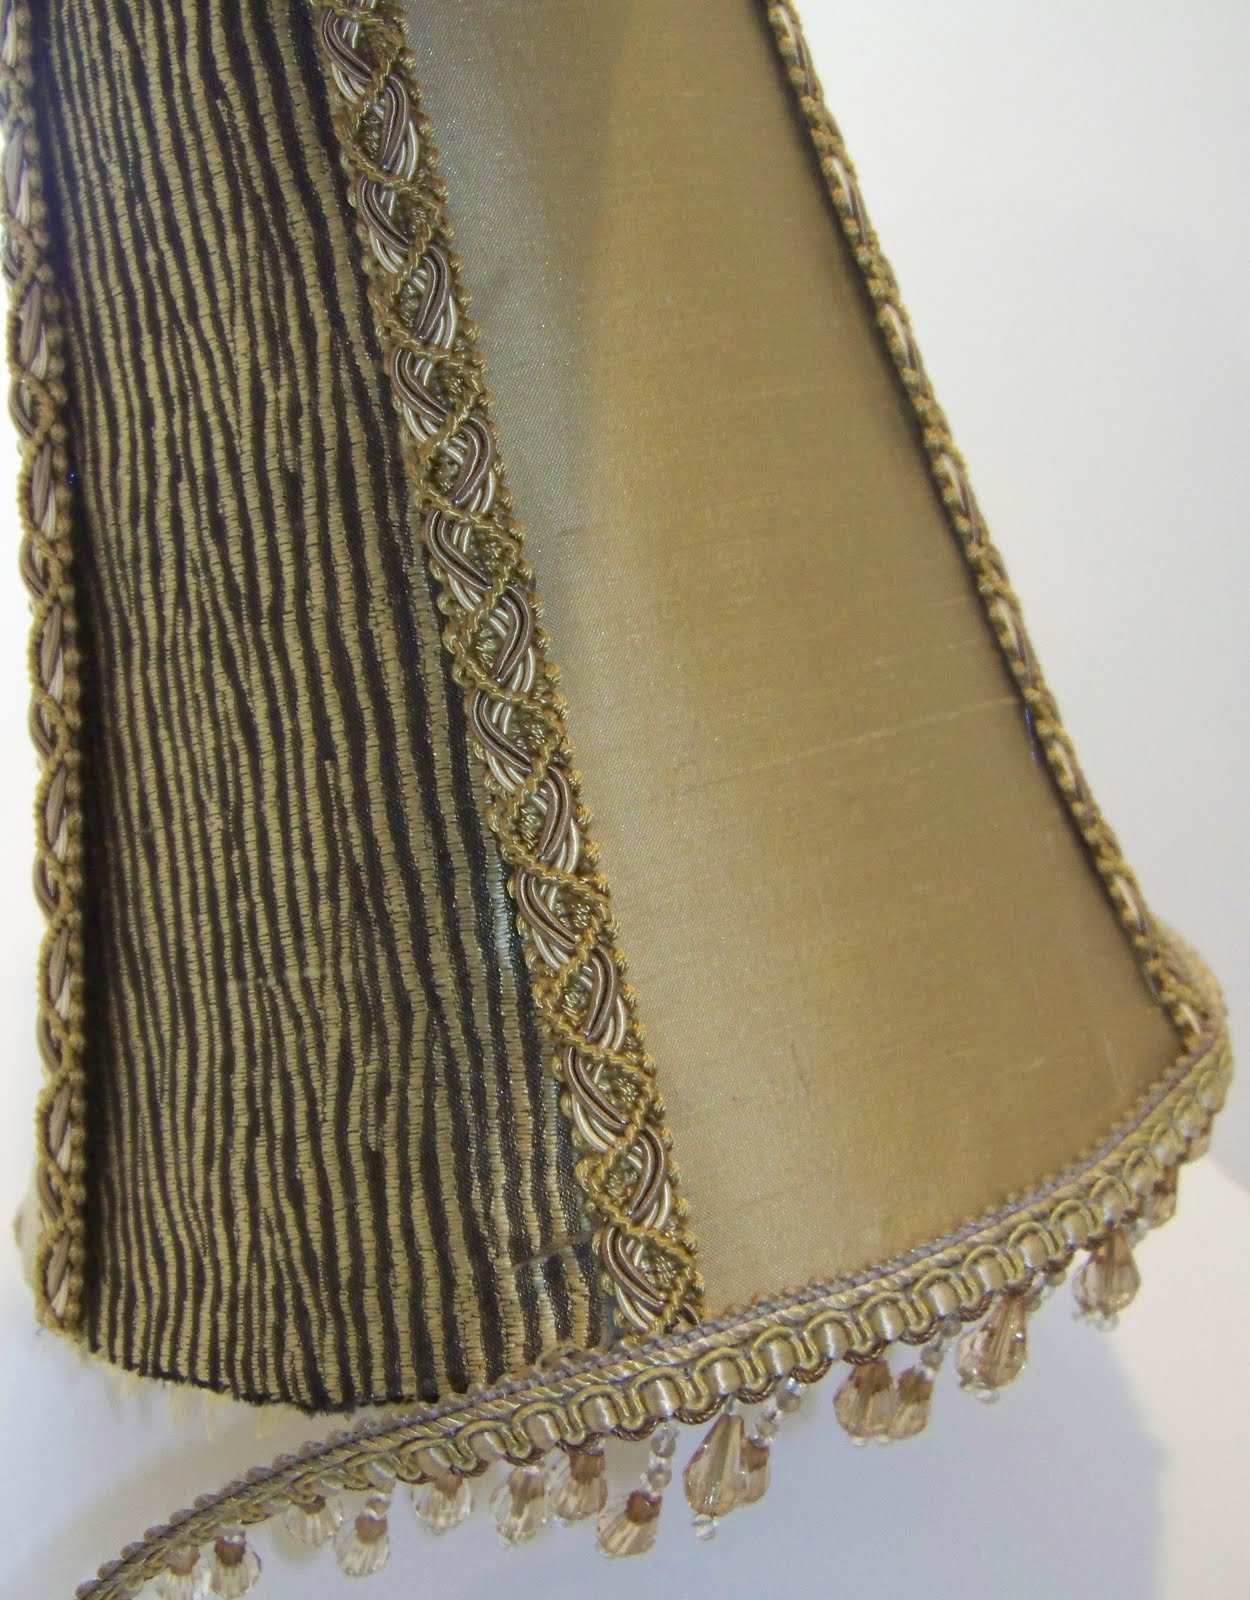
Now to finish off the bottom of the shade. First step is to glue on the beaded trim. This can be done just like the top edge.
When using beaded trim, the ribbon edge needs to be covered to give it a professional look. I used the same braid trim as I did on the top of the lampshade. Just glue the braid directly on top of the ribbon on the beaded trim. Didn’t I tell you that the trim really added a lot!
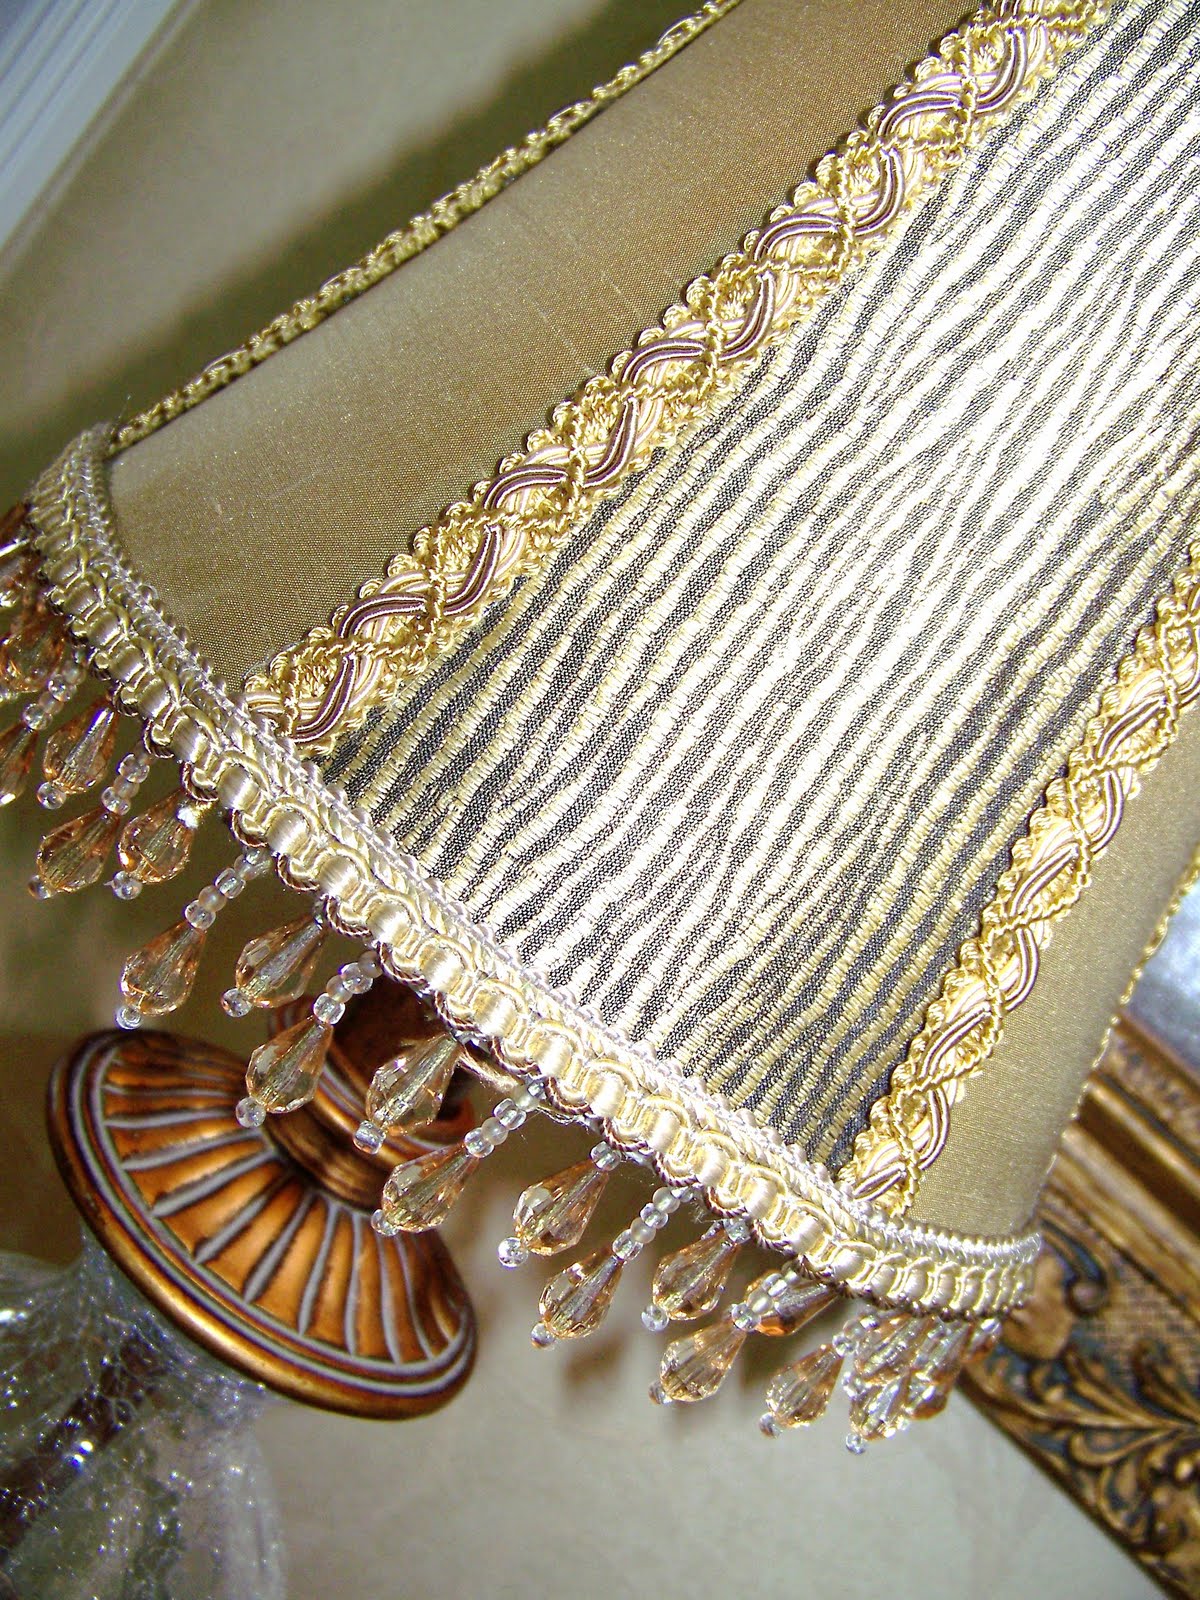
Now for the fun part….. Place the lampshade onto the lamp and turn on the light.
It’s time to admire your creation. A one of a kind custom lampshade.
Hard to believe it’s the same lampshade, isn’t it?
Whenever possible I love to use the beaded trim. I like the “Sparkle†it adds when the lights are turned on! Take a look around your house and turn that ordinary lampshade into something extra-ordinary. It’s easy and you can do it. I’d love for you to come and visit me. Stop by my blog HERE to see another idea on how to add some “glitz and glam†to a lampshade by just adding some trim. Thanks Cheri for the invitation to share my creative ideas. I’ve had so much fun sharing this “Toot†with you.
Thanks Sherry for this great detailed TUTE. We love all the pictures. Sherry has a video for you gals (down below)
Don’t forget to enter one of my Linky parties (any of them since Saturday April 10th) and sign up to follow me and get entered into the COOL give-a-way
WOW!!! Your lampshade turned out SO PROFESSIONAL!! I can’t believe it! Your own tutorial was so complete that I feel confident enough to go searching my house for uncovered lampshades to work on!
Thank you
Lisa
That lampshade turned out beautiful! I have a lamp with great bones that I would like to cover…whenever I get around to decorating my guest room/craft room 😉
Just beautiful, Sherry! {and Cheri!} : ) You’ve got me thinking of what lampshades in my house I can recover. I’ve got plenty of fabric pieces from all my decorator samples. I just need to find some pretty trim.
Cheri, wow, your lampshade turned out fabulous! I love the fabrics and trims that you used. I’m going to bookmark your post. I want to redo my bedroom this summer, and I need to do something about my bedside lamps. You always have such great posts! Gosh girl, to you ever sleep? Just kidding! I really enjoy your blog and love all your great posts!
I love it! It’s funny that today’s post was about making a plain lampshade pretty. This past weekend my youngest busted one (boys!) and I told my husband I needed to buy a new one… and then make it pretty. He laughed. He expected no less. 🙂


.JPG)


{ 10 comments… read them below or add one }
WOW!!! Your lampshade turned out SO PROFESSIONAL!! I can’t believe it! Your own tutorial was so complete that I feel confident enough to go searching my house for uncovered lampshades to work on!
Thank you
Lisa
That lampshade turned out beautiful! I have a lamp with great bones that I would like to cover…whenever I get around to decorating my guest room/craft room 😉
The tutorial was fabulous. Thanks for sharing. I loved it. Hugs, Marty
Just beautiful, Sherry! {and Cheri!} : ) You’ve got me thinking of what lampshades in my house I can recover. I’ve got plenty of fabric pieces from all my decorator samples. I just need to find some pretty trim.
Cheri, wow, your lampshade turned out fabulous! I love the fabrics and trims that you used. I’m going to bookmark your post. I want to redo my bedroom this summer, and I need to do something about my bedside lamps. You always have such great posts! Gosh girl, to you ever sleep? Just kidding! I really enjoy your blog and love all your great posts!
I love it! It’s funny that today’s post was about making a plain lampshade pretty. This past weekend my youngest busted one (boys!) and I told my husband I needed to buy a new one… and then make it pretty. He laughed. He expected no less. 🙂
What a transformation! Love it! Be blessed. Cindy
Hi Cheri! She is a talented gal. I have never covered a lampshade, but that tute was great! Thanks for sharing her with us! Have great day!
Love the lampshade, it looks fabulous!
that is such a great tutorial. Thanks for letting me know about it
Have a great day 🙂