*****************
I got this cabinet door from a garage sale for FREE-yes you read that right. SCORE!!!
(insert eye roll from Prince Charming and a look that said “what are you going to do with ONE cabinet door?”
I had already ordered some of my vinyl from our awesome vinyl gal–Design Divas Vinyl Lettering and Wall Art
She also sells plain sheets of vinyl, so if you have your own Cricut or Silhouette you can order vinyl and still enter the DIY Club monthly contest. That’s right you don’t have to order one of her already made piece, although she has some great piece (even vinyl wallpaper)
She has ready made items in her shop, like this for $9.95

Or this for $21.95:

Or like I said before you can order sheets of vinyl

10 adhesive vinyl sheets* size 6×12 inches each for $7.95
She has other sizes and quantities available.
She sent these very easy to follow directions and a sample to try before you do your REAL vinyl (that would be that butterfly)
It was meant to be–it fit PERFECTLY on the cabinet door (insert Angels Singing)
So I set the vinyl aside and got busy on the cabinet door.
I tried applying a primer before sanding but cutting out that sanding step was not going to do the trick.
I knew better -Sanding was the way to go. For this job I used an electric sander.
Then I applied the primer (but only to the front)
Then I put on a coat of DecoArt Americana Desert Turquoise (isn’t that a gorgeous color?)

You should order a catalog because they have some awesome colors available, that are not in my stores and I have found a few things that are in the catalog but not on line.
Then I did a light coat of Spa Blue, letting some of the Desert Turquoise to show through.
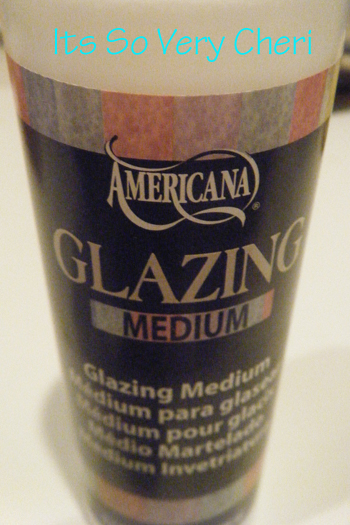
Then I grabbed my GLAZING MEDIUM from DecoArt

I mixed it with the DecoArt Americana Graphite.
A little medium goes a long way.
I did long brush strokes the length of the cabinet and let it set up for a minute….
before I used my Rockler Rags to wipe it off.

I dry brushed a little of the DecoArt Bluegrass Green in a few areas
Dry Brushing is where you get a tiny dab of paint on your brush and then I brush most most of it off the paint brush, then to get even more off I dab it on a rag and you barely brush, soft strokes of color here and there.
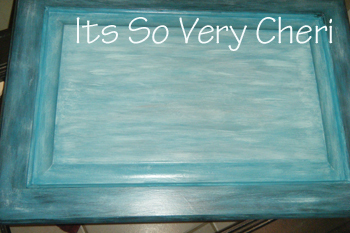
I decided I wanted the outer edge darker, the middle more of a true color and the inside area more white washed. I went over the outer area with a light coat of Deco Art Americana Black Ebony and the inside with Deco Art Americana White Wash.
I then dry brushed in some light gray, white wash and more of the Desert Turquoise (all from DecoArt.)
OK so this is what I had in mind.
Once it was completely dry I got out the level and tape measure and got my lettering lined up–so easy. I made tiny little pencil marks so I could lay it back down in the exact spot that I wanted it, once I removed the backing.
I pressed over the letters with a debit card both so they would come off the paper easier and I used the debit card again to press the letters down.
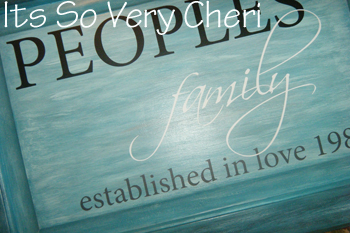
Then I added the bottom line of text.
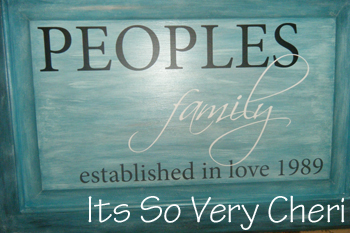
My final step was adding the white lettering. I LOVE how the loop of the “L” swoops up into the “S” and the loop of the “Y” swoops down into the “l”. This was such a FAST and EASY PEASY project.
Have you done vinyl?
I like the option of doing it on boards. I know we will be moving and so I don’t want to place it on a wall and loose it.
Once settled in again I would like to do a few pieces on the walls.
I have a super fun and easy project that I have planned for Fall for you, with vinyl. I think it will come out super cute.
So, now the front is done but to hang it, I need to flip it over.
I grabbed my Rockler sanding BUG–so cool and easy to use. Don’t you love how it comes to a point. Getting in corners or working on detail makes it so much easier.
I needed to sand JUST THE AREA that I would be attaching my DISChanger.

If you go to the Dischanger it tells you how much weight each of the sizes can hold. These things are so strong. I love them for frames and wood pieces as much as plates. They are so much easier than those claw teeth that you have to hammer in.
I got the area sanded and cleaned up, got my dischanger wet and attached it. I let it set up over night and WAH LA!! it was done.
This was a super easy project and a great idea for a Christmas present for someone. I like the idea of Dischangers in some stockings as well.
I will be posting this over at the DIY Club inc The DIY Gals have some amazing projects over there. Go check them out.

I’m linking up to:
tatertotsandjello
Under the Table and Dreaming
Funky Junk Interiors
I am along for the ride
A Little Lovely Blog
I heart Naptime
Cottage Instincts
The Girl Creative
The DIY Showoff
Between Naps on the Porch
Super Stinky Boys
Making the World Cuter
Sumos Sweet Stuff
Mad in Crafts
Crafts Keep Me Sane
Creative 2x Mom
Crafting really awesome free things
Finding Fabulous
Todays Creative Blog
All Thingz Related
Creating A House of Grace
Blue Cricket Design
Sew Much Ado
Domestically Speaking
The Trendy Treehouse


{ 27 comments… read them below or add one }
So cute! I love vinyl and how easy it is to work with. Love the color of the door too.
Great tutorial. This project turned out sooooo cute. I know all about the “husband eye roll at the garage sale” scenario. If only they had the vision 🙂
Thanks for such a great tutorial. Appreicate all the inside information about your sources, etc…,. Love it!
This is neat, Cheri! I’d love to do one of these myself and have plans to hit our Restore at some point for the cabinet doors. I need some vinyl for another project though, so I believe I will be contacting your “vinyl gal”!
Oh – I love this project!
This is great…I put vinyl on a mirror re-do…it was also painted like the colors you used also….I love the vinyl…so much can be done!
That’s awesome, Cheri. I love it. I have a cabinet door that I’ve been trying to decide what to do with. You’ve just inspired me!
Jami
This a great!
coming over from Tatertots and Jello. I’m so impressed with the painting of the door. I wouldn’t even know how to begin to layer paint like that, or what to use. The whole idea is pretty neato.
I love the colors you used – it turned out beautifully!
Doesn’t everyone buy random cabinet doors? Gosh, I do it all the time! I love the blue you used for yours. Stunning!
Glad you could Mi4M 🙂
I love this idea, Cheri! Getting a free cabinet door and making it into a work of art. You are so creative!
Jane
So pretty and creative! Amazing color – love that glazing and how cool with the dischanger! Great job as usual!!!
It turned out beautiful! I love the finish.
Great job!
Monica
Love it! I haven’t tried anything with vinyl yet, but I think I need to! Thanks for linking up to Mad Skills Monday!
We have a great vinyl gal at the DIYClubinc.com with great prices and you can even get plain vinyl and then you can enter the competition.
Cheri
What a terrific idea – looks great!!
Victoria
I used to buy cabinet doors at a Habitat for Humanity store in San Antonio. They were only 50 cents a piece and we made SO many different things. You may want to check and see if there is a place like that near you. Or a cabinet making factory will also sell the slightly imperfect doors for super cheap! Thanks for sharing. It looks great!
Very cute idea I would love it if you would link up to my new link party!
http://memakingdo.blogspot.com/2010/08/your-so-very-creative-link-up-party.html
That’s such a clever piece of art and I like the color combo a lot.
News! On Friday we’re starting a link-up-your-giveaway party called Friday Giveaway (and we’ll announce an amazing giveaway). Please join us.
I hope we can link up on your Friday page too.
Jane F.
LOOOVE this, Cheri! I absolutely adore the color — it’s beautiful! Great job!!
I’ve so been wanting to make one of these for a while, with the family name on it. I love your glazing technique, it’s lovely!
We must have been thinking a like this week. I just finished my cabinet door sign. Yours looks great!!! Please check mine out as well.
http://houseofthriftydecor.blogspot.com/2010/08/from-kitchen-cabinet-to-laundry-room.html
WOW!! That is awesome!
You have been featured at SSB!!! Check out your feature at the link below:
http://superstinkyboys.blogspot.com/2010/08/mad-skills-monday-link-party-23.html
Feel free to snag my I Was Featured button to add to your blog! Thanks bunches!
It looks terrific! I love it!
Hi Cheri
So excited to see your project of Power of Paint. Apparently my handpainted wallpaper project is being featured later this week.